If you're on Pinterest, I'm sure you see the post about cutting your own hair at least once a week from The Frugal Farm Wife. Ever since finding it, I haven't been back to my salon since.
But, here's the thing. I cut my hair using the Frugal Farm Wife's method, but I had to modify it. The hair cut is only really a trim for me. When I cut my hair, I usually want a drastic difference. Enough so people notice.
 |
| Maybe, if I can bring the Rachel back, "Friends" will make a comeback, too? |
After seeing a picture the boyfriend took of me from the side, I saw the end of my ponytail was a dry, split mess. And it was half-walk down my back. It was time for a haircut.
WARNINGS:
- I am NOT, in any way, a professional hairdresser. I'm not even an amateur hairstylist. In fact, I'm pretty sure most of my tips come from getting what my former hairdresser called the "modified Rachel" for 10 years and paying attention to certain techniques.
- I know my hair pretty well. I know lots of layers makes my head feel lighter and tends to give it the boost it needs, especially in the back.
- My hair grows in thick and quickly. I never stopped taking prenatal vitamins just because of that fact. If I make a mistake, I can usually just blend it into the other layers around it.
- My hair, without styling is wavy in the back and straighter in the front. And there's a lot of it. I know this works with my hair. Even though my hair tends to curl when it's wet, I have no idea how this cut looks or works with curly hair or thin hair.
One more warning: This style, as I've said, is a "modified Rachel." The Rachel came out in 1994. 199-freakin'-4! I didn't have it then. I didn't get this haircut until 10 years later! But, I loved it. The low-maintenance kept me hooked. All it took was some blowdrying with a barrel brush or, what I usually do, a few flips from the curling iron and I could run my fingers through it as much as I wanted and it would land right back where it was. It only made sense, after letting my hair get long hat I would end up chopping it right back to the Rachel every few months.
Even though people warned me about not cutting my hair and getting a "mom" cut, I'm pretty sure since I've had one, technically, since college, it doesn't count ... even if it is a haircut that is almost old enough to drink.
So, without further ado, if you've decided you're still with me and want to trust your locks in, uh, your own hands. Get out the scissors and let's get started!
First, here's the before shot, taken at 3:21 p.m.

Wet your hair. In my case, I took a shower, which explains the time lapse between the above and below photos.

Using a comb, part your hair upwards from the front of your ear to the top of your head. Repeat on the other side and clip up.

One last chance to say goodbye to your hair.

Brush/comb the unclipped hair forward as you bend over.

Then, following The Frugal Farm Wife's guide, cut straight across.

Compare what you're about to cut to what you've already cut as your guide.

I usually end up losing the straight line along the way and end up comparing sides to even it out.

Flip back up, admire your work. If you're anything like me, you're skeptical you cut anything at all.
Part your hair horizontally from the tops of your ears and tie the top portion up.

Part the back down the middle and pull a side section out so it's perpendicular to your head. Using a comb and your fingers, flatten it (vertically) as much as you can. Cut straight up.

I kind of eye it when I do it so I usually run the risk of getting it uneven. I just continue to repeat the step above with the longer side and snip until it evens out.

Let your hair down and make another horizontal part with your comb higher than before. Tie the rest up, part down the middle and comb the side out perpendicularly and cut, using the length of the bottom as your guide.
TIP: For more pronounced layers, imagine you're holding your hair out like hands on a clock. I like regular, not-too-chunky layers, so I'm holding my sections at 3 o'clock. For more pronounced layers, hold it further up, like at 1 or 2 o'clock. For a lightly layered look, hold at 4 or


Continue to repeat the steps for each additional layer until you've cut all the hair except what was originally clipped up from the front.

Usually the back of my hair is still too thick for my comfort, so I end up grabbing the section of hair right at the crown of my head and pulling it up into a Cindy Lou Hoo look and cutting straight across, using already-cut layers as my guide.
Also, it's in the back so I'm not to concerned with how it looks. Honestly. I'm not. I never see the back of my head, so why worry about it? Besides, there's are already so many layers, it's kind of hard to screw it up at this point.

The next step if to whip your hair back and forth. OK, it's not. But this shot was taken as I was leaning to make sure it's pretty much similar looking in length when tilted.

Next, take down that front portion and clip up the back. Comb in front of your face as you lean over again. Cut straight across, like before. I eyeball the length, since I like my hair to frame my face, but I still want enough length to put it in a ponytail.

Not sure why this is the only photo I took of how it looks when you stand back up. I am so harnessing my inner Hannah Horvath from GIRLS look right here, bad haircut and all.

Part your hair as you normally would. Mine naturally parts to the left side. Take the hair and comb it out to the side and flatten it vertically with your fingers. Bring the fingers close to the end, since you've already done most of the chopping to the front.

Instead of cutting straight up, point the scissors toward your head as you cut to angle each snip. My hairdresser used to do this to give the front of my hair more definition. Snip any ends that seems just too long. You can even point the scissors directly into your hair and snip to thin out the ends.

And, you're good to go!

After firing up the hair dryer and curling iron, here's the finished look. Final time, 4:24. So a little over an hour.

"Ross, we were NOT on a break!"

I am so ready for my giant latte and listening to The Rembrandts!

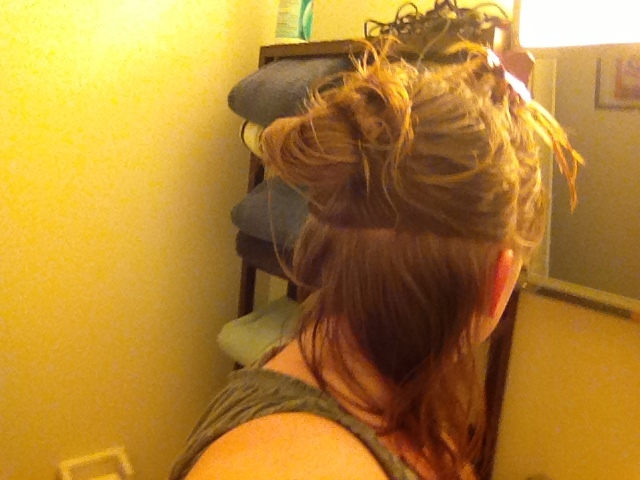
And awkward picture of the back.
So, there you go. From grungy '90s alternative to stylish '90s Rachel. I am so hip!
No comments:
Post a Comment